Traditional mozzarella (clabber cultured)
Based on the book The art of natural cheesemaking by David Asher
Cost: 6 euros
Equipment
- One 4-L (1-gallon) pot
- Wooden spoon
- Large stainless steel slotted spoon disinfected
- Stainless steel measuring spoons disinfected
- 3 Camembert-sized cheese forms about 4 inches (10 cm) across and 3 inches (8 cm) deep I used La Faisselle molds
- Cheese knife to cut the curds or narrow spatula, disinfected
- Large bowl
Ingredients
- 4 L 1 gallon good milk
- 60 mL 4 T or 1 / 4 cup milk kefir or active whey (clabber) I used clabber
- Regular dose rennet I used 40 drops or a scant 1/4 tsp liquid calf rennet
- 60 mL (¼ cup) filtered/ bottled/ non-chlorinated water to dissolve the rennet
- 1 / 4 cup (4T) 60 mL good salt
Instructions
- Warm milk to 32°C (90°F), or baby-bottle-warm.
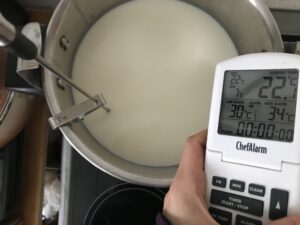
- Add starter culture, either kefir or whey. Mix the culture in well, then cover the pot and keep warm at 32℃ for 1 hour.
- Add rennet, and incubate 1 hour: Measure out the appropriate amount of rennet for your milk.
- Dissolve it in 1 ⁄ 4 cup (60 mL) water, then gently mix it into your warm milk. Cover the pot, and keep warm for another hour.
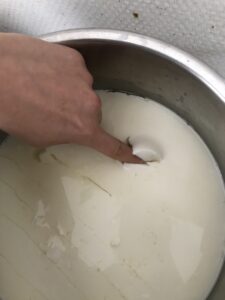
The clean break test
- It involves sticking your finger into the curd at a 45-degree angle. You should feel a pop as your finger breaks the surface tension of the curd—it’s a rather satisfying sensation, as it tells you the curd is ready. Then lift your finger straight up. The curd should rise above your rising finger, then cleave cleanly in two.
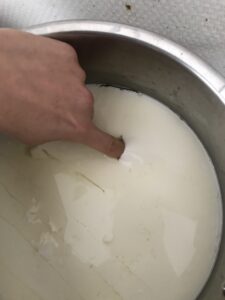
- Check for clean break to determine if the curd is ready to proceed.
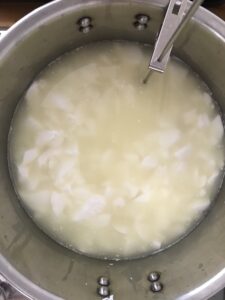
- Cut the curds to 2 cm (3 ⁄ 4-inch) pieces by making three series of cuts — one vertical …
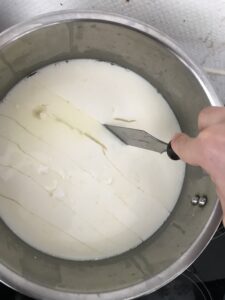
- … another vertical but perpendicular to first cut …
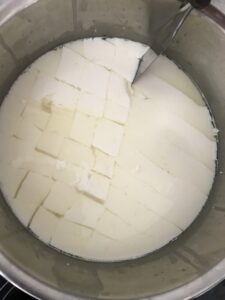
- … and the third on an angle close to horizontal.

- Stir the curds lightly, and cut any large curds to size.
- Stir lightly every 5 minutes for 30 to 60 minutes. Warm up the pot slightly, if need be, to maintain a constant 32 ℃.
- Pitch and whey off. Once the curds have developed a poached-egg-like firmness, let them settle in the pot for 5 minutes. Pour off the whey, and reserve it all for fermenting your curds.
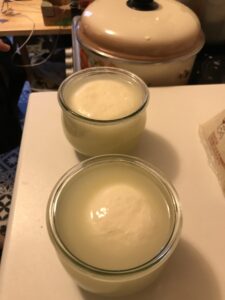
- Transfer the curds by hand into the cheese forms. Let the curds drain in their forms for 1 hour, until they knit together into a cheese.
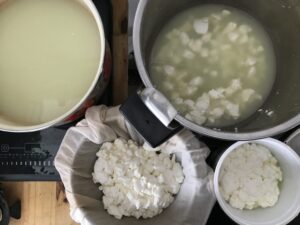
- Ferment the cheeses in their whey: Remove the cheese from their forms, and submerge them in a potful of their leftover whey. Allow the curds to slowly ferment in the whey at room temperature.Keep the pot covered to keep out flies.

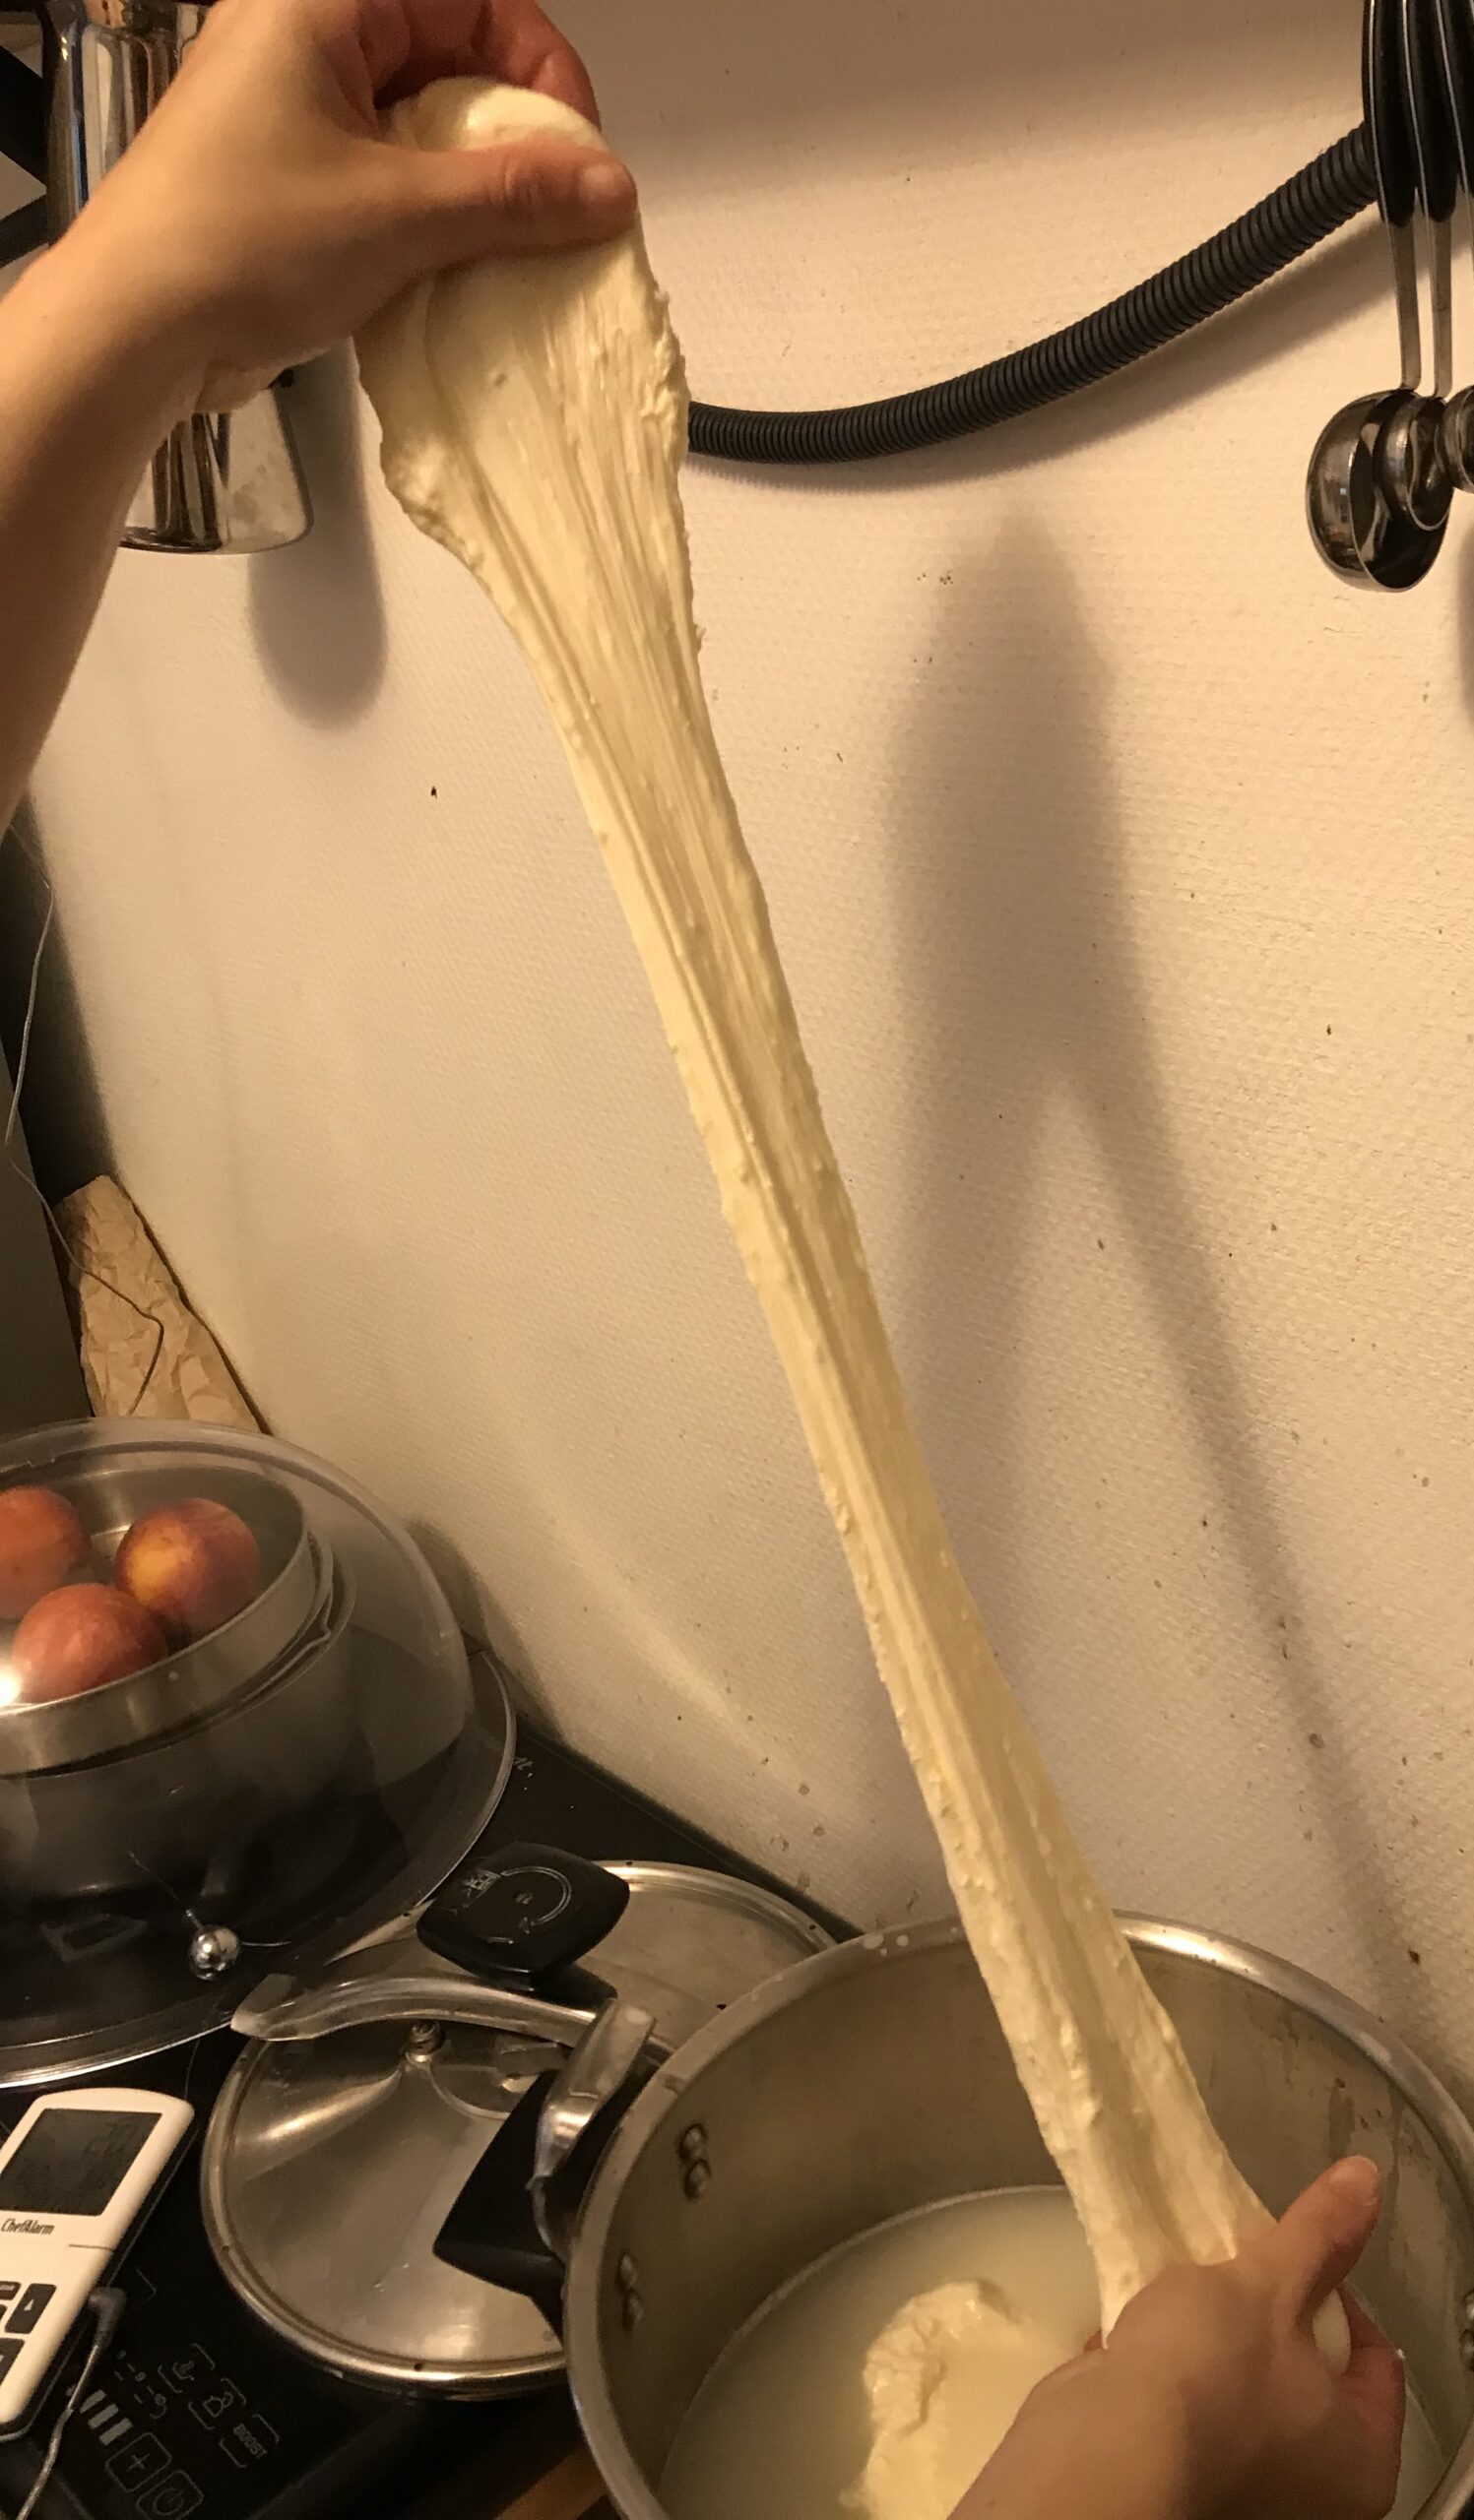
- Do a stretch test every hour: Every hour or so, submerge a small piece of curd into hot water. Wait 2 minutes, then examine its stretchiness. If the curd spins a very fine thread when stretched, it is ready for the next stage. If it does not, wait an hour, and try the stretch test again.
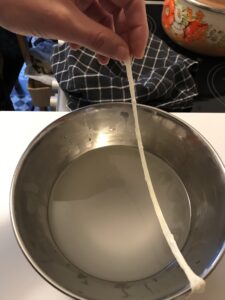
- It usually takes between 8 and 12 hours of fermentation for the curd to spin. One approach is to leave the curd to ferment overnight and finish the mozzarella the next day.I attempted the test for the first time after a fermentation of around 5 hours and it worked, so I proceeded with the next step.
- Prepare a hot-water bath: Heat 1 ⁄ 2 gallon (2 L) of water to a hot temperature —around 66˚C (150°F).

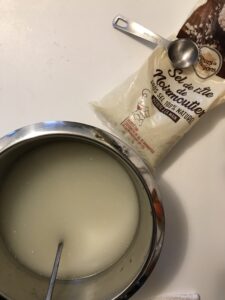
- Prepare a light salt brine by dissolving 1 ⁄ 4 cup (60 mL) of salt into 1 quart (1 L) of the whey in a bowl.
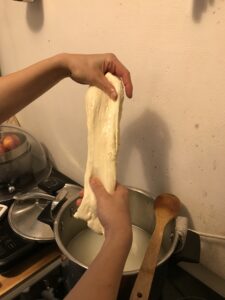
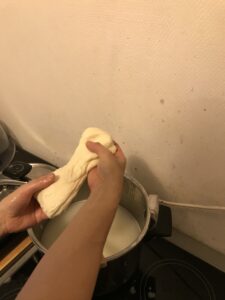
- Submerge the curds in the hot-water bath. Allow them to warm for 5 to 10 minutes; then, with a slotted spoon, retrieve them one at a time from the water to shape them.
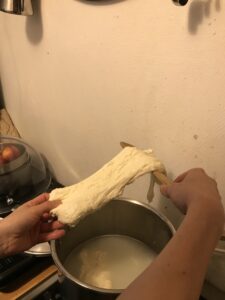
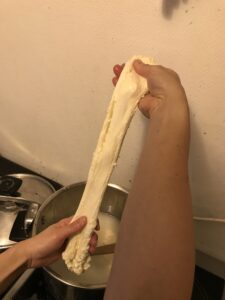
- Stretch and roll your mozzarella balls:
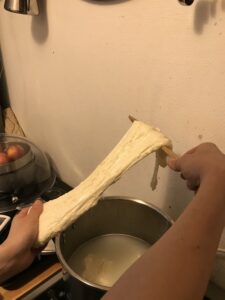
- The hot curd will begin to become silky and plastic.
- Stretch and knead the curd for a brief moment, and submerge it again in the water to continue warming.
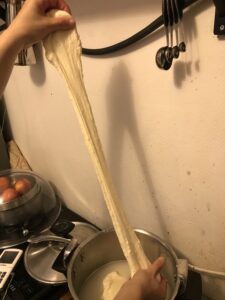
- Once it is thoroughly plastic, stretch the curd into a long, thin rectangle, roll it onto itself while tucking in the edges, and form the curd into a small, round shape.
- Stretch the tail of the curd thin and tuck the ball of cheese within to finish.
- Seal the mozzarella
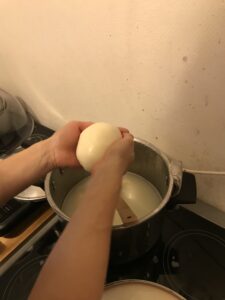
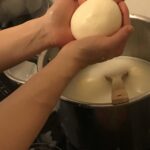
- Resubmerge the mozzarella in the hot water for a minute, then cup it firmly in your hands to give the cheese its final shape.
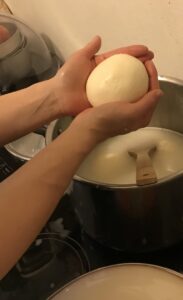
- Submerge your mozzarella balls in the salty brine to cool. Eat and enjoy while still slightly warm.
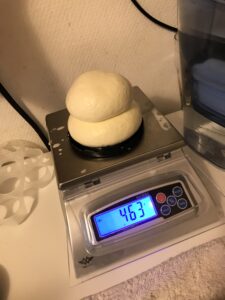
- Preserve the mozzarella: It can be kept, submerged in its brine, in a refrigerator for up to 1 week.This amount of milk (4 L) produced 463 gr of mozzarella.
Leave a Reply